
End Grain Butcher’s Block
This end grain butcher’s block is both easy to make and beautiful. These boards make great gifts, decor, or additions to your own kitchen! They can be made with very little material or just some scraps you have in your shop!
Tools & Materials:
Palm Router https://amzn.to/37XCtJM
Wood Glue https://amzn.to/3dVtxsu
Delta 36-725 Table Saw: https://amzn.to/3reIucP
Miter Saw: https://amzn.to/307gWtW
Bosch Plunge Router: https://amzn.to/2PqXgPs
Jointer: https://amzn.to/3GWiJ9o
Surfacing Bit: https://amzn.to/3CTRIku
Food-Safe Mineral Oil: https://amzn.to/301BPdd
Random Orbital Sander: https://amzn.to/30lk9tN
Parallel Clamps:https://amzn.to/3nyR8n6
Wood Screws: https://amzn.to/3oQD1J1
Planer: https://amzn.to/3kYtP4l
Miter Gauge: https://amzn.to/3kX5yM2

I first find the scrap lumber that I want to use for this board and mill it down at the planer.

I then use my jointer to joint one edge to ensure it is completely flat.

I next cut the material to width at the table saw.

Finally for milling material, I use my miter saw to cut the material to length.

I arrange my boards in an orientation that I like for the first glue up.

I now use wood glue to apply an even coat of glue to the edges of the boards.

Once the glue is applied, I put all pieces into my parallel clamps and let the glue dry.

Once the glue has dried, I go back to the planer to plane down the entire board. This is a very important step that ensures the board is completely flat and uniform.

I use my miter gauge at the table saw to straighten one edge of the board.

I next cut my board into strips. The width of this cut with roughly determine the thickness of your final product.

I then arrange my boards into the final pattern I like. Some of them get flipped over, etc. to create a beautiful pattern.

I now apply wood glue again to all side edges in an even application.

I turn each board upright and tactfully fit them together.
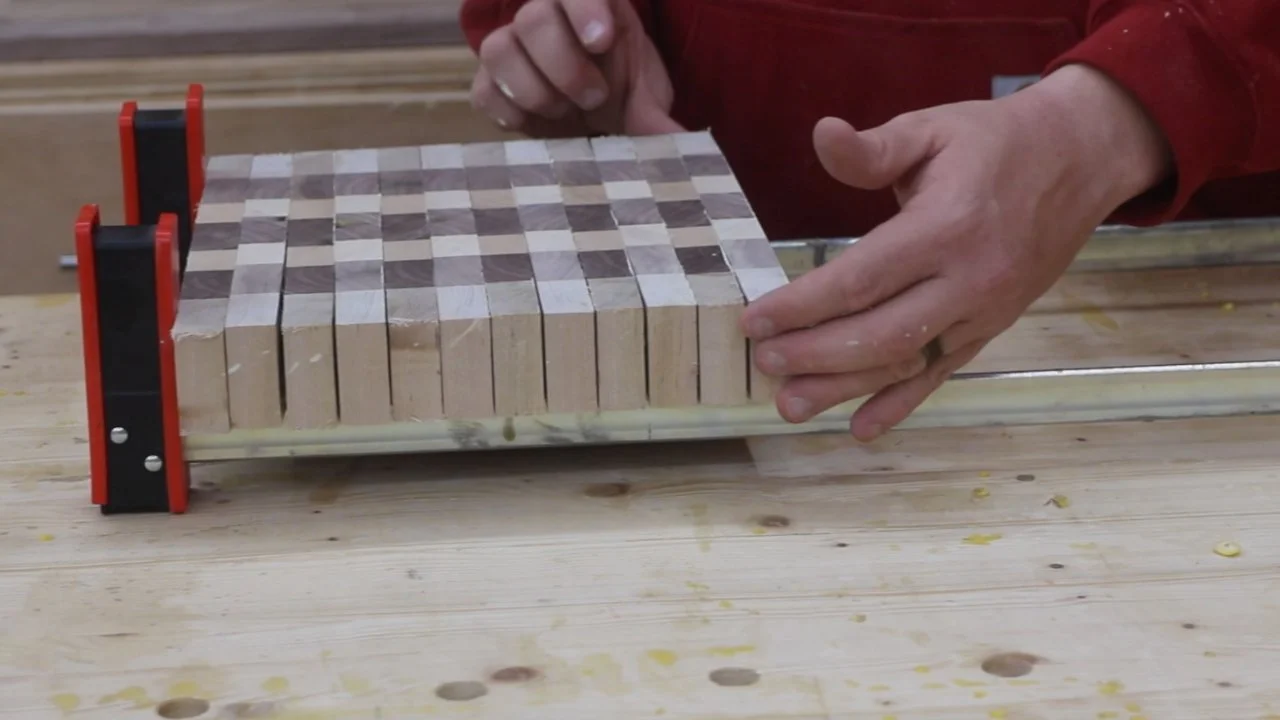

I again use my parallel clamps to apply even and strong pressure to the glue up, and let the glue dry.

Once the glue has dried, I use my DIY Flattening Sled (click here to make one for yourself) to flatten the entire board using a surfacing bit.

After the board has been flattened on both sides, I use a palm router and a roundover bit to apply a slight roundover on all edges. This eases the edges and gives a better appearance.

Now for sanding - I start at 80-grit with my random orbital sander and work my way up to 150-grit. After sanding with 150-grit, I wet the entire board with water. This will raise the grain. After the water has dried, I sanding everything again with 150-grit, and continue working my way up to 220-grit.

After sanding is complete, I use Food Safe Mineral Oil for finish.

I apply a liberal amount of oil to the board in a flood-coat fashion and work it into the board so there is a heavy and even coat on the entire board.

After about 20 minutes and the oil has had a little time to dry, I use a rag to buff off the excess oil.

And now, the board is complete, and is looking great!