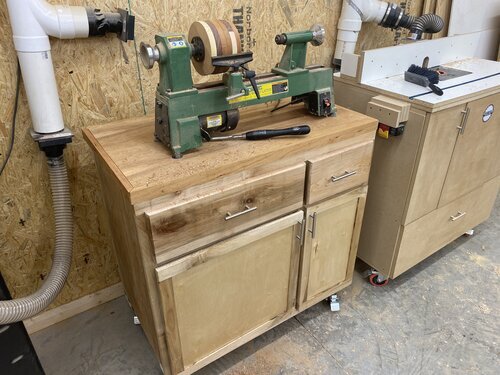
Lathe Stand With Storage


I begin by ripping down 3/4” Maple Plywood to the width of the side panels of the stand. I also cut them to size along with the top panel. For the bottom and back panels, I use 3/4” Pine Plywood to save money, since these panels will not be seen.


Once everything is cut to size, I begin drilling pocket holes in the necessary panels and assembly them using 1 1/4” Kreg Pocket Hole Screws.
After the carcus of the stand is built, I add some 2x4s to the bottom of the stand to add extra security for mounting the locking swivel casters.


I then grab some rough cut lumber of Cherry and Maple, and begin milling them down to size. I mill everything to 3/4” thick and 2” wide. This will be used to make the top trim out of the Cherry, and the face frame from Maple.

Once milling is complete, I cut everything to final dimensions and assemble the face frame to each other, then secure it to the stand.

For the top Cherry wood trim, I secure it around the edge of the Maple Plywood top panel, using miter joints at all corners.

Following the installation and assembly of the face frames, I begin making drawer boxes. I had enough maple plywood leftover to make the larger left side drawer box. I used Pine Plywood to make the drawer box for the smaller right side drawer box. The method I use for making these drawer boxes is simply with pocket holes and pocket hole screws. After the drawer boxes are made, I install heavy duty drawer slides for each drawer, and install the drawers.

I then begin making solid maple face fronts for the drawers, measure the spacing, and install them. I do this by screwing through the back of the inside of the drawer box into the back side of the drawer fronts.

Next I being milling rails and stiles for the cabinet doors and router a groove down the middle. This groove will accept 1/4” Birch plywood for a cabinet door panel. I cut a tenon on the ends of the stiles that will fit into the groove of the rails, to finish all rails and stiles for the perimeter of the cabinet doors. I then dry fit everything to ensure a correct fit, and glue everything in place, including the 1/4” birch plywood panel.
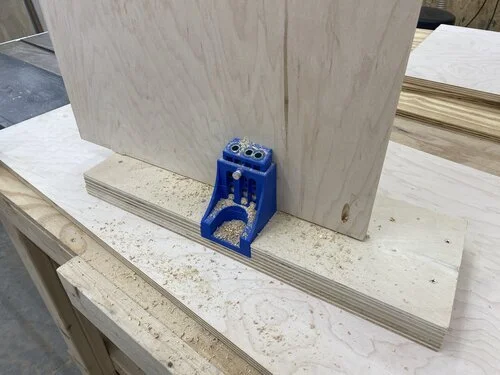
I use the Kreg concealed hinge jig to drill holes for the hinges and install the hinges on the doors. I then install the entire door and hinges onto the stand’s face frame. After all face fronts and wood components are installed and complete for the stand, I install some brushed nickel cabinet pull hardware.
I give everything a thorough sanding through the grits, and apply 3 coats of polyurethane finish and tung oil.
This project is now complete!