
Showcase Storage Cabinet
This project was super fun to build and a rewarding project to finish. I decided to use oak for the project to include oak plywood and solid oak. It measures roughly 48″ x 36″ x 10″ and is durable and will last a lifetime!
TOOLS & MATERIALS I USED:
Diablo Table Saw Blade: https://amzn.to/3ujEwBx
48″ T-Square: https://amzn.to/3bsO5Wa
DEWALT Cordless Circular Saw: https://amzn.to/3s6uH8e
DEWALT Cordless Drill: https://amzn.to/3sdJii7
KREG Pocket Hole Jig: https://amzn.to/3sfqwHm
KREG Pocket Hole Screws: https://amzn.to/3uiUPyz
KREG Clamp: https://amzn.to/3ummO08
KREG Concealed Hinge Jig: https://amzn.to/37x8atu
Concealed Style Hinges: https://amzn.to/3dEGlTX
Pneumatic Finish Nailer: https://amzn.to/3dyXPRt
Slot Cutting Router Bit: https://amzn.to/37zd74G
Acrylic Sheet: https://amzn.to/3sfBegY
6-Inch Full Extension Drawer Slides: https://amzn.to/3dvo8Ig
Cabinet Knobs: https://amzn.to/3k76Jab
Drawer Pull Handles: https://amzn.to/37x8CrG
LED Strip Lights: https://amzn.to/2NjqC1S
True Position Tools Hardware Installation Jig: https://amzn.to/3qFjMlr
Titebond Wood Glue: https://amzn.to/3sfv8wU
Wood Screws: https://amzn.to/3s90G7y
Early American Wood Stain: https://amzn.to/3aCFcKn
Foam Brushes: https://amzn.to/3pERQNw

The first step in this process is to measure and mark a line across the 4×8′ sheet of plywood to be cross-cut.
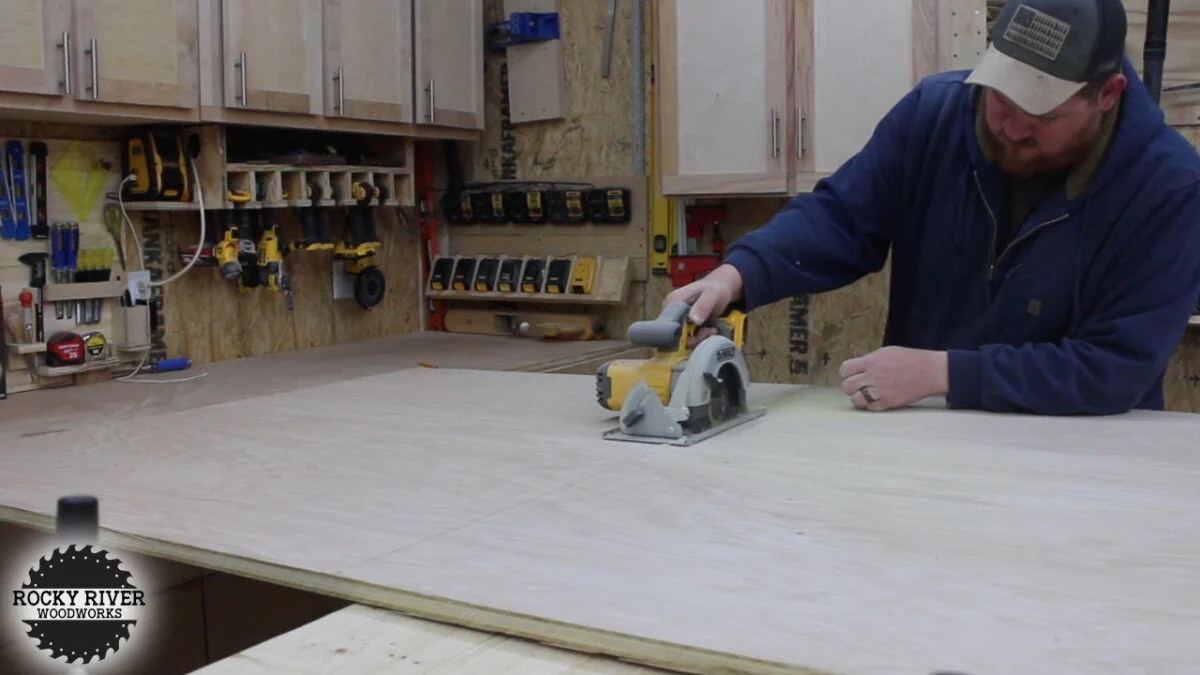
Using my circular saw, I cross-cut the plywood to length for the backer piece of the cabinet.

The remaining cabinet carcass pieces get ripped down to width at the table saw.

I then cut the pieces to final length at the miter saw.

Once all of my pieces are dimensioned to the correct sizes, I drill pocket holes on all pieces of the cabinet carcass where needed. I do this by using my pocket hole jig.


The next step is to begin assembly. I start by installing the side pieces to the backer panel using 1 1/4″ pocket hole screws. I then attach the top and bottom pieces to the carcass using regular brass wood screws. I do not mind if these pieces have visible screw heads as they will not really been seen on the top and bottom of the cabinet once it’s installed.

Next I measure and note the location of the shelf piece. I also ensure it is the same measurement on each of the sides of the cabinet. This will ensure the shelf is level once the project is complete.


After the line is marked, I install the shelf piece using pocket holes that are screwed into the backer piece of the cabinet.


I now begin to work on the face frame. I use solid stock for this and rip it down to the width at the table saw, and cross cut it to final length at the miter saw.

I drill pocket holes into the necessary ends of the face frame pieces using my pocket hole jig.


I then fully assemble the face frame using 1 1/4″ pocket hole screws. Once the individual pieces are secured to each other, the face frame is now complete and ready to attachment to the carcass.

I attach the face frame to the cabinet carcass using 18 gauge finish nails with my pneumatic nailer. If you do not want to nail through the visible front of the frame, you could opt to install pocket holes on the cabinet carcass, and secure the frame to the carcass with pocket holes from the inside of the cabinet.

The cabinet carcass and frame is now complete. I now begin making a drawer for the bottom of the cabinet.


For the drawer I decided to use some leftover 3/4″ Maple plywood I had in my shop. I rip down the material to width at the table saw, cross it to length at the miter saw, and install pocket holes on all of the pieces that need them.

I build the drawer box using 1 1/4″ pocket hole screws. This is a pretty simple method of making drawer boxes, but you could opt for something more in-depth if you wish, such as rabbets, dados, etc.
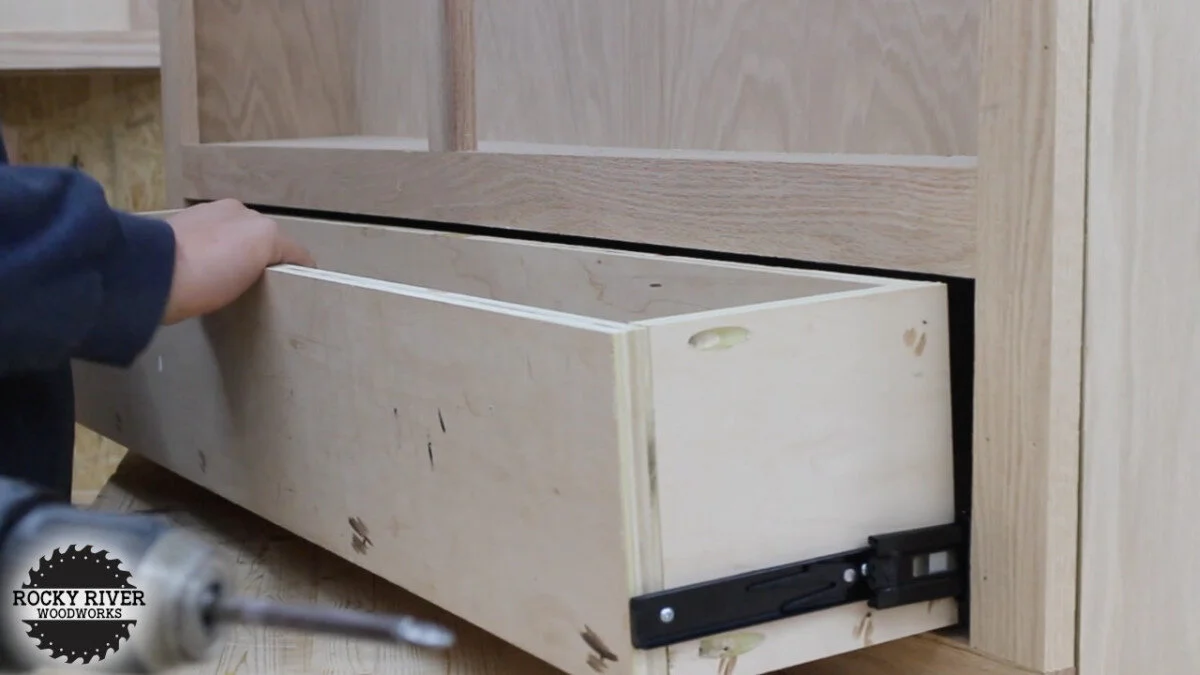
Once the box was built, I installed the drawer into the cabinet. I found some small 6″ drawer slides and used those on each side of the drawer.

The drawer front I decided to make was made out of solid wood. However, with a drawer front this size, it could be hard to find a solid piece of wood. So, you could also use plywood with edge banding if you wish. The drawer front was secured in place by drilling wood screws through the insider of the drawer box and into the drawer front from the back.

I now head back to the table saw once again to rip down some solid stock material that will be used to make the rails and stiles of my cabinet doors.

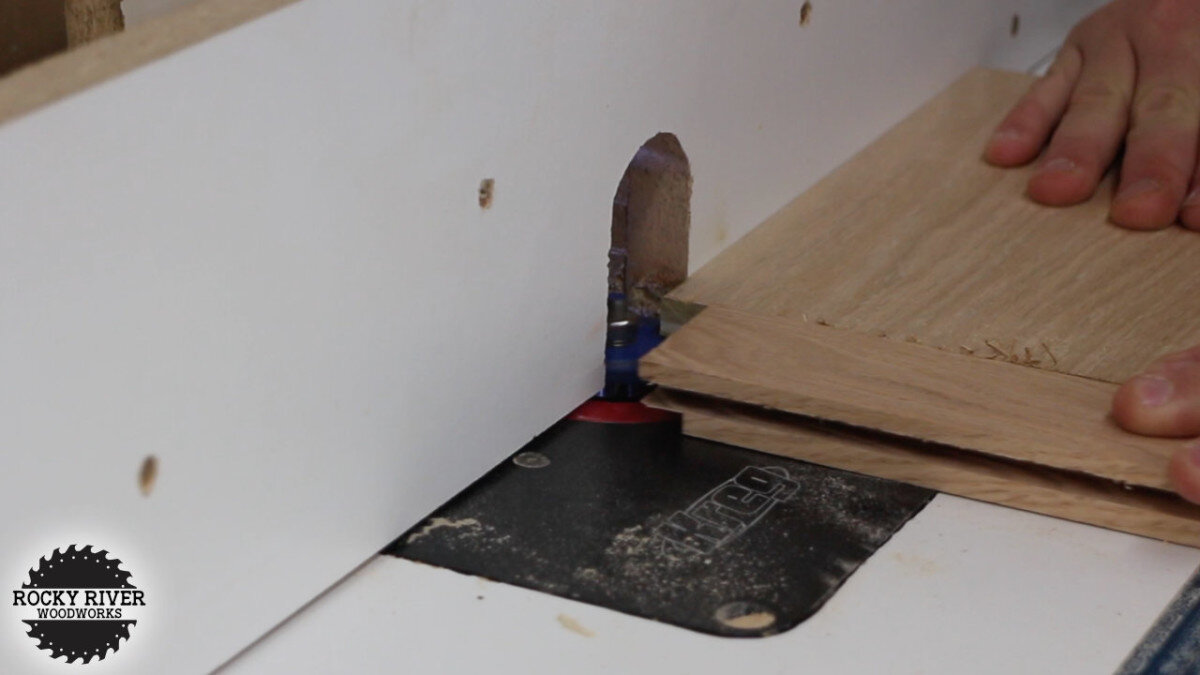

I then installed a slot-cutting bit in my router table and began making a groove for the glass panel to slide into, as well as tenons for the ends of my stiles. The slot cutting bit was set to a height that would be center of my stock material to ensure the groove and glass panel are centered. I then lowered the bit to cut the tenons.

I decided to use acrylic Plexiglass panels instead of real glass. So, after cutting the acrylic panels to size, I test fitted and began assembly of the doors. I installed wood glue at all wood joints of the tenons/grooves on both the rails and stiles. I did not install glue along the entire length of the glass panel on the stiles and rails as I do not feel it is needed. This will also allow movement of the glass panel within the door frame assembly.


Once the glue dried, I began staining the entire project to include the cabinet carcass, face frames, door frames, and drawer front. I did not stain inside the drawer box itself. The stain I opted to use Is Early American. If you wish, you could also use another stain, paint, or even a varnish finish instead.


My display cabinet is being used as a pistol storage cabinet. So, I began marking locations of where I needed peg holders, and drill them. I am using black bolts that will act as pegs. After drilling the holes, I installed the bolts, nuts, and washers through the front side of the backer piece as well as a washer and nut on the rear side of the cabinet to secure them in place.

I opted to install lighting within the cabinet. I found some LED strip lights that had an adhesives backing on them, and installed those on the inside of the cabinet against the face frame where they would shine against the backer piece of the project.


I opted to use concealed style hinges for my doors. So, I used my concealed hinge jig to install the holes on the doors. I then installed the hinge hardware and mounted the doors onto the cabinet. You could also opt to use other types of hinges if you wish.


The last step of this project was to install the door knob hardware and drawer pulls. I did this using a cabinet hardware installation jig. I opted for black hardware to match my peg holders, but you could decide on whatever type of hardware you like.

This project is now complete and ready for install or mounting on the wall!