
Hardwood End Table
This hardwood end table can be made in 1 day and looks great! The contrasting colors in the legs and top makes for a great addition to any space!
Tools & Materials:
Wood Glue https://amzn.to/3dVtxsu
Flush Trim Router Bit: https://amzn.to/3sK2Smk
Straight Cut Router Bit: https://amzn.to/3sK2VP2
Delta 36-725 Table Saw: https://amzn.to/3reIucP
KREG Router Lift: https://amzn.to/3rgsAPd
DEWALT Cordless Drill: https://amzn.to/3rsJ71T
Bosch Plunge Router: https://amzn.to/2PqXgPs
Belt Sander: https://amzn.to/3mIXdNg
F-Clamps: https://amzn.to/2ZXSYV9
Jointer: https://amzn.to/3GWiJ9o
Random Orbital Sander: https://amzn.to/30lk9tN
Tung Oil: https://amzn.to/3HmRDIz
Parallel Clamps:https://amzn.to/3nyR8n6
Planer: https://amzn.to/3kYtP4l
Miter Gauge: https://amzn.to/3kX5yM2
Doweling Kit: https://amzn.to/30SaxXl

I start like any project, by milling up some Sapele at my jointer. This material was already planed, I just needed to joint one edge.

I now use the flat edge to reference against my table saw fence, and cut the material into 2 1/4” wide strips. The material is 18” long.

I now apply some wood glue to all Sapele faces, in preparation for a butcher-block style glue up.

I rotate all pieces up on edge and glue together. I use parallel clamps for strong clamping pressure.

I add some wooden clamping calls on the edges and clamp to the glue up. This keeps all pieces flat and co-planer to each other.

While the glue dries, I work on the Maple legs. I start by milling one edge at the jointer.

Since these weren’t milled like the Sapele, I have to plane them down at the planer to create a uniform thickness and co-planer sides.

I now laminate 2 pieces of Maple together to achieve a 1 1/2” thick leg. I need 4 legs though, so I laminate multiple sets with wood glue.

Even though I have separate sets of glue ups, I clamp them all together in one set of clamps. Look at that squeeze out!

After the glue is dry, I take the glue up assembly to the jointer again to mill one edge and ensure the 2 glued up pieces are flat and flush to each other.

Now I use my table saw to cut the Maple legs to a final dimension of 1 1/2” thickness.

I square up the ends of the legs and cut them to final length using my miter gauge.


I layout and mark the locations of where my notch needs to be cut on the bottom brace pieces.

I remove my table saw blade and install some dado blades as I will be using a 5/8” dado stack to make the cuts for the notches.

I start at the sides of the marks for the notches, and move through the center to the other side of the notch. I repeat this process for the other brace piece.


I spread some wood glue in each notch and fit them together. I apply a clamp in the center and let the glue dry.

I now install the legs with just wood glue. You could also use another type of joinery though if you wish.

Now that the Sapele glue up has dried, I use a belt sander to sand all of the pieces flush to each other and smooth.

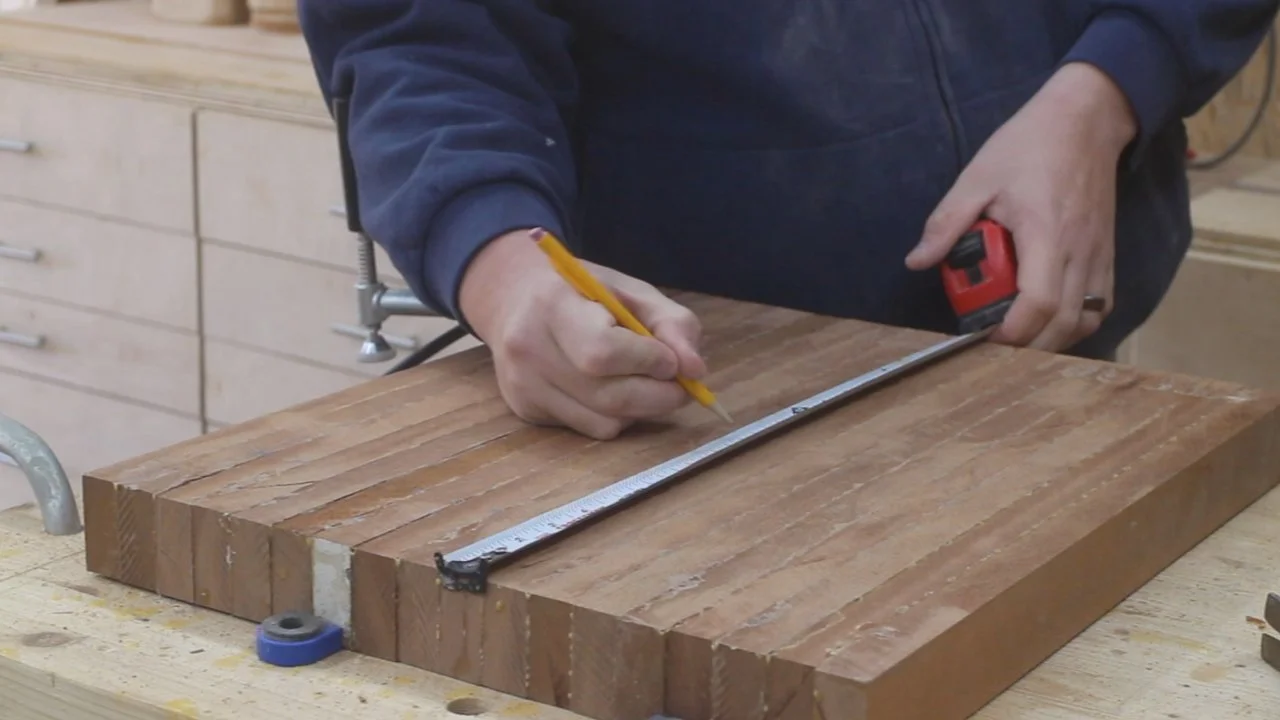
I now mark center in both directions of the Sapele top.

I made an MDF circle jig for my router and installed a nail at my center mark on the Sapele, which will be a pivot point for making a circle.

I install a straight cut router bit into my router and begin cutting out the circle. I do not go full depth in one pass. I lower the router little by little, until the bit has cut as deep as it can.

I use my band saw to rough cut the circle, keeping the band saw blade within the cut from the router.

I now install a flush trim bit into my router table and finish making the circle cut and ensure the edges are all flush and complete.

I then use a roundover to put a 3/4” roundover around the top piece.

I lay my leg assembly onto the Sapele top and make sure it is centered with an even reveal on all sides. I then trace out the legs onto the top to note the locations.


I drill a pilot hole in both the Sapele and the ends of the Maple legs. I install a dowel and wood glue in each hole and install the leg assembly to the Sapele top. I put everything into parallel clamps and let dry.

I now sand the entire project. I start at 60-grit and work through the grits up to 220-grit.


I finish the table in Tung Oil. I apply a liberal amount of oil and let dry, then buff off the excess.
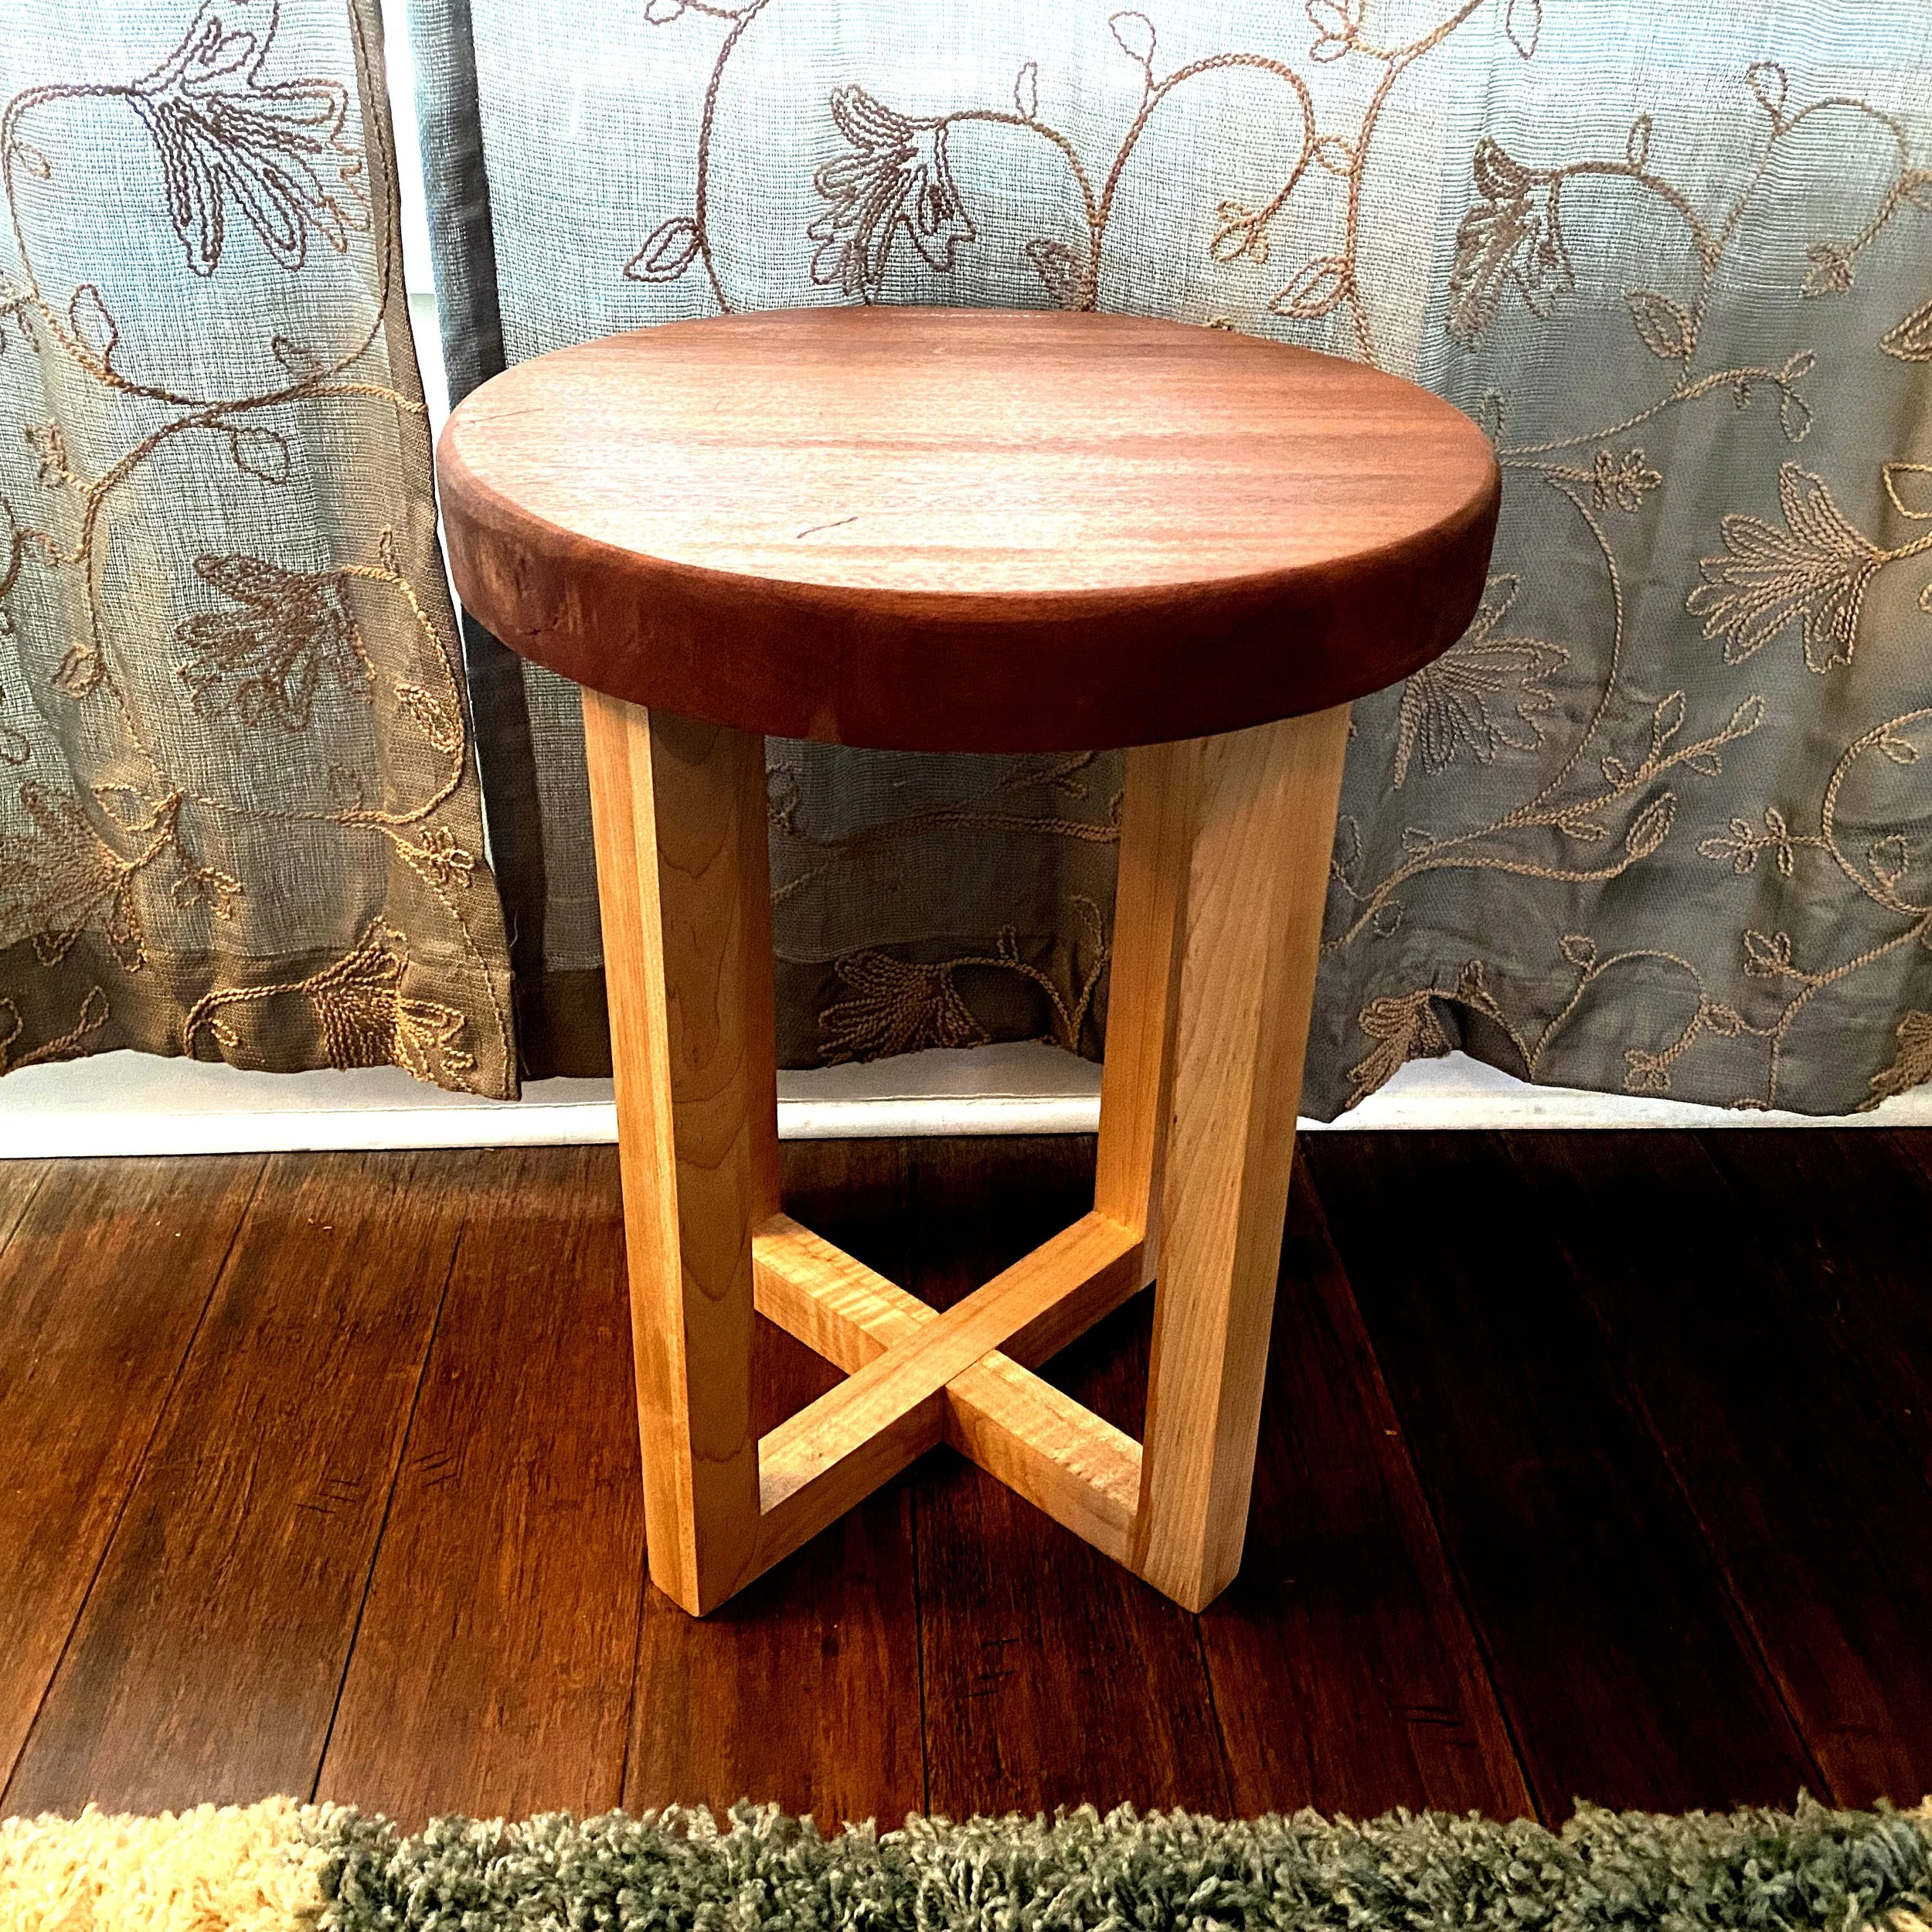
This project is now complete!